For any coffee aficionado, the pursuit of the perfect cup goes beyond selecting premium beans and mastering brewing techniques. It extends to the meticulous care of your equipment, especially your coffee grinder. Over time, coffee oils build up in the grinder’s hopper, often overlooked but silently sabotaging the flavor of your carefully chosen beans. These sticky residues, particularly from darker, oilier roasts, can turn rancid, impart off-flavors to fresh coffee, and even impede your grinder’s performance.
Maintaining a pristine hopper isn’t just about aesthetics; it’s crucial for preserving the integrity of your coffee’s taste and extending the lifespan of your grinder. This comprehensive guide will walk you through effective methods to remove stubborn coffee oil buildup, ensuring every brew is as fresh and flavorful as intended.
 A close-up of a coffee grinder hopper showing sticky, dark coffee oil residue on the inside.
Why Coffee Oils Become a Problem
Roasted coffee beans, especially darker roasts, contain natural oils. While these oils contribute to the rich aroma and flavor profile, they can also leave a sticky film inside your grinder’s hopper. Over time, exposed to air, these oils oxidize and become rancid. This rancid residue can then contaminate fresh beans, imparting a stale or bitter taste to your coffee, regardless of the quality of your new batch.
Beyond taste, oil buildup can affect the grinder’s functionality. It can alter static charge, causing coffee grounds to clump and stick, leading to inconsistent grinds and potentially clogging the bean flow. Regular cleaning is therefore not just a recommendation but a necessity for anyone serious about their coffee.
How Often Should You Clean Your Hopper?
The frequency of hopper cleaning largely depends on your usage habits and the type of beans you grind. As a general rule, a thorough cleaning every 1 to 2 weeks is recommended for most home users. However, if you frequently brew coffee, use dark, oily roasts, or operate in a commercial setting, more frequent cleaning—even daily wiping—may be necessary. Oily, dark roast beans and flavored coffees tend to leave more residue, necessitating more diligent care. Pay attention to visible residue or a change in your coffee’s taste as indicators for when cleaning is due.
Step-by-Step Guide to Removing Coffee Oils from Your Hopper
Cleaning your coffee grinder hopper doesn’t have to be a daunting task. Here’s a detailed approach to tackle oil buildup:
1. Preparation and Disassembly
Before you begin any cleaning, always prioritize safety:
- Unplug your coffee grinder from the power source to prevent accidental activation.
- Empty the hopper of all remaining coffee beans. Store them in an airtight container if you plan to use them later.
- Remove the hopper if it’s detachable. Many hoppers can be easily twisted or lifted off their base. If your hopper is integrated, you’ll need to clean it in place.
|
Our Picks for the Best Coffee grinder in 2026
As an Amazon Associate I earn from qualifying purchases.
|
||
| Num | Product | Action |
|---|---|---|
| 1 | Hamilton Beach Custom Grind Electric Coffee Grinder for 4-14 Cups, One-Press Hand-Free Operation with Auto Shutoff, Removable Grinding Bowl For Easy Pour and Clean, Stainless Steel (80406) |

|
| 2 | Hamilton Beach Fresh Grind Electric Coffee Grinder for Beans, Spices and More, Stainless Steel Blades, Removable Chamber, Makes up to 12 Cups, Black |
|
| 3 | SHARDOR Professional Conical Burr Coffee Grinder, Coffee Bean Grinder with 48 Grind Settings for Espresso, Drip & French Press, Upgraded Anti-Static Technology, Precision Timer, Stainless Steel |
|
| 4 | BLACK+DECKER One Touch Coffee Grinder, 2/3 Cup Coffee Bean Capacity, Spice Grinder, One Touch Push-Button Control -150 Watts -Stainless Steel Blades |
|
| 5 | Automatic Coffee Machine, 20-Bar Pressure Espresso Maker with Built-in Grinder, 15-Precision Settings, One-Touch Latte & Cappuccino System, Smart Self-Cleaning |
|
| 6 | Amazon Basics Electric Coffee Grinder, Coffee Bean and Spice Grinder, With Heavy-Duty Stainless Steel Grind Blades |
|
| 7 | Cuisinart Coffee Grinder, One Touch Control Coffee Bean Grinder with Stainless Steel Bowl and Blades, 2.5 oz/70g Capacity Enough for 12 Cups, On/Off Switch with Safety Interlock, DCG-20BKN, Black |
|
| 8 | OXO Brew Conical Burr Coffee Grinder - Silver, Stainless Steel Burrs, One-Touch Automatic Smart Grind |
|
| 9 | Wancle Electric Coffee Grinder, Spice Grinder, One Touch Coffee Mill for Beans, Spices and More, with Clean Brush Black |
|
| 10 | Cuisinart Coffee Grinder, Electric One-Touch Automatic Burr Coffee Grinder with 18-Position Grind Selector, Cup Size Selector for 4 – 18 Cups, DBM-8P1, Black Stainless |
|
2. General Cleaning for Removable Hoppers
For hoppers with moderate oil buildup that can be removed:
- Wash with Warm, Soapy Water: Use a mild, unscented dish soap and warm water. Wipe the inside and outside of the hopper with a soft, non-abrasive cloth or sponge.
- Rinse Thoroughly: Ensure all soap residue is completely washed away. Any leftover soap can affect the taste of your coffee.
- Dry Completely: Crucially, dry the hopper thoroughly with a clean, lint-free cloth. Allow it to air dry completely before reassembling to prevent moisture from damaging grinder components or promoting mold growth.
3. Tackling Stubborn Oil Residue
For tougher, caked-on coffee oils, consider these methods:
- Baking Soda Paste:
- Mix baking soda with a few drops of water to form a thick paste.
- Apply the paste to the oily areas inside the hopper.
- Let it sit for about 5 minutes to allow the baking soda to work its magic.
- Gently scrub with a soft brush or damp cloth.
- Rinse thoroughly and dry completely.
- White Vinegar and Warm Water Solution (for Plastic Hoppers):
- Create a solution of equal parts white vinegar and warm water.
- If removable, soak the plastic hopper in this solution for about 15 minutes.
- Scrub gently, rinse thoroughly, and dry completely.
- Lemon Juice:
- Pure lemon juice is a natural acid that can effectively cut through coffee oils.
- Apply lemon juice to a cloth and wipe down the oily surfaces.
- Rinse and dry as usual.
- Isopropyl Alcohol (90%+) for Extreme Cases (for Plastic Hoppers):
- For extremely stubborn residue on plastic hoppers, apply 90%+ isopropyl alcohol to a soft cloth (never directly into the hopper).
- Wipe the affected areas.
- Immediately follow with a clean, damp cloth to remove alcohol residue, then dry completely. Use this method sparingly and ensure thorough rinsing to avoid leaving behind any chemical traces.
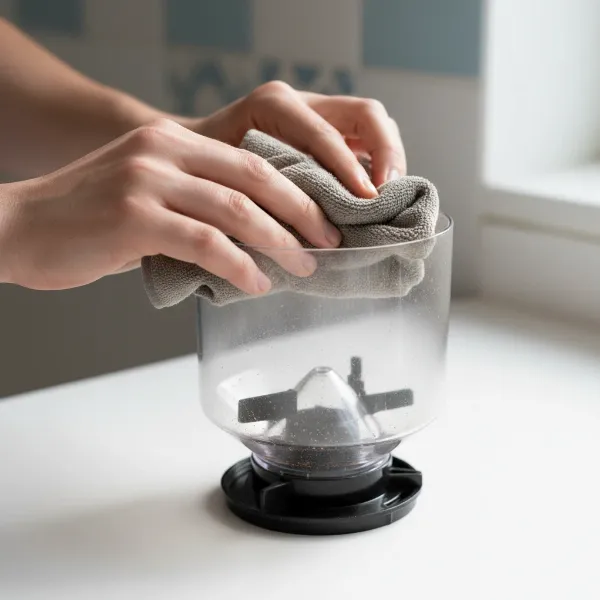 A hand cleaning a detachable coffee grinder hopper with a cloth and soapy water.
4. The Rice Flour Method (for Burr Grinder Hoppers without Disassembly)
A unique and effective method for burr grinder hoppers, particularly for abrading oils without disassembly, involves food-grade rice flour:
- Empty and Wipe: First, empty all beans from the hopper and wipe interior surfaces with a dry microfiber cloth.
- Apply Rice Flour: Apply about one teaspoon of food-grade rice flour to the hopper walls.
- Rotate and Vacuum: Gently rotate the hopper for approximately 30 seconds to allow the rice flour’s mild abrasiveness and absorbency to lift the oils.
- Vacuum Thoroughly: Use a vacuum with a soft-bristled brush attachment to remove all rice flour and loosened oils.
This method leverages rice flour’s natural ability to absorb lipids and gently exfoliate without moisture, making it ideal for systems where liquid contact should be minimized. Manufacturers like Baratza and Eureka have shown this to be highly effective for non-invasive hopper deoiling.
5. Daily Maintenance
Incorporating a simple daily habit can significantly reduce the need for deep cleaning:
- After each use, or at the end of the day, wipe out the inside of the hopper with a dry paper towel or lint-free cloth to remove any loose grounds and surface oils. This prevents buildup from hardening.
What to Avoid When Cleaning Your Coffee Hopper
While cleaning is essential, using the wrong methods or materials can damage your hopper and even compromise your coffee’s flavor:
- Abrasive Materials and Harsh Chemicals: Steer clear of scourers, abrasive sponges, or strong chemical cleaners. These can scratch the hopper’s surface, making it more prone to future oil accumulation and potentially leaching harmful substances into your coffee.
- Boiling Water: Do not use boiling water on plastic hoppers, as it can cause small fractures or deform the plastic. Warm water is sufficient.
- Solvents: Avoid chemical solvents. They can discolor the hopper, degrade the plastic, or leave undesirable odors and residues that will taint your coffee.
- Grinding Raw Rice: While food-grade rice flour is recommended for hoppers, grinding raw rice through the burrs of a grinder (especially burr or ceramic grinders) is generally cautioned against. The hardness of raw rice grains can potentially damage or break the burrs, a common misconception often seen in cleaning advice. Use specialized grinder cleaning tablets for internal burr cleaning.
Maintaining Hopper Clarity and Longevity
Beyond active cleaning, proactive measures can keep your hopper in top condition:
- Store Beans Properly: Only put the amount of coffee beans you need for immediate grinding into the hopper. Store excess beans in an opaque, airtight container in a cool, dark place to minimize oxidation and oil release.
- Wipe Daily: A quick daily wipe-down goes a long way in preventing significant buildup.
- Follow Manufacturer Guidelines: Always refer to your specific grinder’s manual for model-specific cleaning instructions and recommendations.
Conclusion
Keeping your coffee grinder’s hopper free of rancid coffee oils is a critical step in crafting consistently delicious coffee. By regularly cleaning with the right methods—from simple soap and water to specialized rice flour treatments for burr grinders—you protect your coffee from off-flavors, maintain your equipment’s efficiency, and extend its lifespan. Don’t let neglected oils compromise your morning ritual. A clean hopper is a happy hopper, and a happy hopper means a happier, more flavorful cup of coffee every time.
What are your go-to cleaning tricks for keeping your Coffee Grinder hopper spotless?
Frequently Asked Questions
How do I know if my coffee grinder hopper needs cleaning?
You’ll typically notice a sticky, brownish film on the inside of the hopper, especially near the bottom. Your coffee might also start to taste stale or slightly bitter, even with fresh beans, indicating rancid oil contamination.
Can I put my coffee grinder hopper in the dishwasher?
While some hoppers are dishwasher-safe, it’s crucial to consult your grinder’s manufacturer manual first. Many plastic hoppers can warp or become brittle over time in a dishwasher’s high heat, and certain materials may not withstand harsh detergents.
Are there commercial cleaning products specifically for coffee hoppers?
Yes, some specialized coffee equipment cleaners are safe for hoppers. However, many are designed for internal grinder burr cleaning (like grinder tablets). Always check product labels to ensure they are safe for direct contact with hopper materials and rinse thoroughly.
Why is drying the hopper completely so important after washing?
Any residual moisture in the hopper can lead to mold growth, which is detrimental to hygiene and can severely impact coffee flavor. Furthermore, if water gets into the grinder’s electrical components or burrs, it can cause damage or rust.
Does cleaning the hopper improve coffee flavor significantly?
Absolutely. Rancid coffee oils are a primary source of off-flavors in coffee. By regularly removing these oils from the hopper, you ensure that your fresh coffee beans are not tainted, allowing their true flavor profile to shine through in every cup.